From Fresh to Forever: How to Preserve Your Favorite Flowers at Home
Explore the world of flower preservation with our guide, which covers everything from the reasons why preserving flowers can be emotionally rewarding to a brief overview of the top methods used to keep your blooms beautiful for years.
Share This Post!
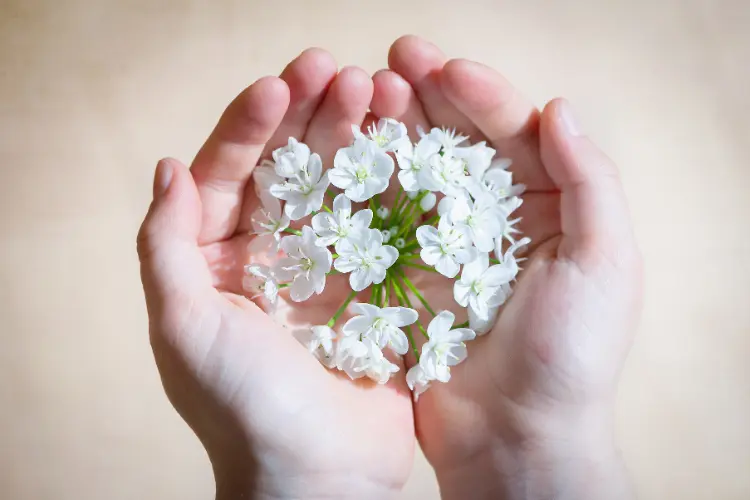
Flowers bring more than just beauty to our lives; they carry deep emotional connections and mark significant moments. Whether it’s a wedding bouquet, a graduation corsage, or a just-because gift, flowers have a special way of capturing the essence of an occasion.
However, their beauty is fleeting, and preserving these blooms allows us to hold onto those precious memories a little longer.
Table of Contents
The Emotional Value of Fresh Flowers
Fresh flowers, with their vibrant colors and delicate fragrances, naturally lift our spirits and enhance our environments. However, their transient nature often means that we can only enjoy their beauty for a short period.
By preserving flowers, we capture the joy and sentiment they represent, allowing us to relive special moments whenever we glance at these preserved beauties.
Importance of Preserving Flowers
Beyond their emotional significance, preserved flowers serve as lasting decor, adding a touch of elegance and nostalgia to our homes or workplaces. They are also a sustainable option, reducing waste and the need for fresh flowers, which can be costly and environmentally demanding over time.
Section 1: Overview of Flower Preservation Methods
Flower preservation is an art that allows us to extend the life of beautiful blooms far beyond their natural lifespan.
Whether you are a hobbyist looking to keep your garden flowers a little longer or someone wanting to preserve a special bouquet, understanding the various methods available is the first step.
Each method offers unique benefits and is suited to different types of flowers and desired effects.
Air Drying: The Most Traditional Method
Air drying is perhaps the simplest and oldest method of flower preservation. It involves hanging flowers upside down in a dry, well-ventilated area away from direct sunlight.
Over a few weeks, the flowers will slowly dry, retaining much of their shape and some color. This method is perfect for robust flowers like lavender, roses, and hydrangeas.
Pressing: Ideal for Crafting and Flat Displays
Pressing flowers is another traditional technique that is especially popular among crafters. This method involves placing flowers between two absorbent pieces of paper and pressing them under a heavy object or in a special flower press.
The result is perfectly flat, dried flowers that are ideal for use in scrapbooking, framed art, and other decorative projects.
Silica Gel Drying: Best for Maintaining Color and Form
Silica gel drying involves burying flowers in a granular, sand-like substance that effectively absorbs the moisture from the petals and leaves without causing discoloration or significant shrinkage.
This method is fantastic for preserving the vibrant color and three-dimensional shape of flowers, making it ideal for more delicate blooms like orchids and peonies.
Microwave Drying: A Quick Method for Immediate Results
For those who need to preserve flowers quickly, microwave drying is a convenient option. This method uses silica gel and a microwave to speed up the drying process, typically completing it in just a matter of minutes instead of days or weeks. While it requires careful monitoring to prevent overheating, it’s a great way to achieve rapid preservation with good color retention.
Glycerin Method: For a Flexible, Lifelike Preservation
The glycerin method replaces the water in the plant with glycerin, resulting in a flower that maintains its flexibility and often its natural color.
This technique is particularly good for preserving foliage and branches, which can then be used in floral arrangements or as standalone displays. Flowers treated with glycerin feel soft and pliable, almost as if they are still alive.
Each of these methods offers a unique set of benefits, and choosing the right one depends largely on the type of flowers you wish to preserve and the purpose for which you are preserving them.
Whether you’re looking to create a durable keepsake or a piece of decorative art, there’s a flower preservation technique that can meet your needs.
Section 2: Detailed Preservation Techniques
In this section, we delve deeper into the specific steps and tips for successfully preserving flowers using air drying, one of the most accessible and traditional methods. Air drying works best for certain types of flowers, and following a detailed guide can help ensure that the results are both beautiful and long-lasting.
Method 01: Air Drying Flowers
Air drying is favored for its simplicity and the minimal equipment required. It’s an excellent method for preserving a wide range of flowers, although some types are better suited to this method than others.
Choosing Suitable Flowers: Best Types for Air Drying
Not all flowers dry well in air, but many do. The best candidates are those with less moisture in their petals and sturdy structures. Flowers like roses, lavender, hydrangeas, globe amaranth, and statice tend to retain their shape and color well when air-dried.
Avoid very fleshy flowers like orchids or tulips, which may decay before drying completely.
Step-by-Step Guide: Detailed Instructions for Air Drying at Home
- Harvesting: Pick flowers at their peak since they won’t mature any further once cut. Early morning is the best time for cutting, after the dew has evaporated but before the sun is too hot.
- Preparing: Remove excess foliage from the stems and any wilted or damaged petals. For thicker stems, split the ends to promote even drying.
- Tying: Group flowers into small bunches, tying the stems together with string. Keep bunches small to ensure adequate air circulation.
- Hanging: Hang the flower bunches upside down in a warm, dry, and dark place. Basements, attics, or closets work well. Avoid areas with high humidity or direct sunlight.
- Waiting: Leave the flowers to dry for about 2 to 4 weeks. The exact time will depend on the flower type and the environmental conditions.
Pro Tips: Ensuring Optimal Results and Longevity
- Ventilation: Good air circulation is crucial. A fan can help in areas with poor natural airflow.
- Darkness: Protect drying flowers from sunlight to prevent fading of the colors.
- Check Progress: Check on your flowers periodically to make sure there is no mold growth. If flowers start to look limp or soggy, increase air circulation and reduce humidity in the area.
- Storage: Once dried, store the flowers in a dry, dark place until ready to use. Use silica gel packets in storage containers to help absorb any excess moisture and prevent deterioration.
By following these detailed instructions and tips, you can successfully preserve the beauty of your favorite flowers through air drying, creating lasting memories and decorations for your home.
Method 02: Pressing Flowers
Pressing flowers flattens them, removing moisture and preserving their shape and color in a two-dimensional form.
This technique is particularly suited to flowers with naturally flat faces or thin petals.
Selecting Flowers: Which Flowers Press Well
The best flowers for pressing are those with relatively flat faces and not too much bulk. Flowers like pansies, violets, and cosmos press well, as do leaves from plants like ferns.
Bulky flowers such as roses can also be pressed, but they may require more preparation, such as splitting them down the middle.
Traditional Pressing: Using Heavy Books for Pressing
- Preparation: Place the flowers between two sheets of absorbent paper. Parchment paper, blotting paper, or even newspaper can work.
- Positioning: Arrange flowers face down, ensuring they are spaced out and not overlapping.
- Pressing: Place the paper with flowers inside a heavy book. Add more books or weights on top for additional pressure.
- Drying: Leave them to press for 2-3 weeks. Check periodically to ensure they are drying and not molding. If the paper is damp, replace it with fresh paper.
Mechanical Pressing: How to Use a Flower Press for Better Results
- Setup: A flower press typically consists of wooden plates with cardboard and absorbent paper layers in between.
- Layering: Arrange the flowers on the cardboard, cover with a paper layer, and then add another cardboard layer on top. Continue stacking if pressing multiple flowers.
- Tightening: Use the screws or bolts on the flower press to tighten the layers together, applying even pressure across the flowers.
- Waiting: Leave the press closed for about a week, then check on the flowers. They may need more time based on their type and moisture content.
Creative Applications: Incorporating Pressed Flowers into Home Decor and Art
- Framed Art: Arrange pressed flowers in a frame behind glass for a beautiful, natural piece of art.
- Greeting Cards and Stationery: Use clear-drying glue to affix pressed flowers onto cards or paper for a lovely, personalized touch.
- Bookmarks: Laminate pressed flowers within bookmarks for a durable and attractive design.
- Candles and Soaps: Embed pressed flowers into the surfaces of handmade candles or soaps for decorative purposes.
- Resin Jewelry: Place pressed flowers into resin molds to create unique, botanical-themed jewelry pieces.
Pressing flowers is an accessible and versatile preservation method that allows for a wide range of creative uses. Whether you are making home decor or personal gifts, pressed flowers provide a charming and lasting way to hold onto the beauty of nature.
Method 03: Silica Gel Drying
Silica gel is a desiccant — it adsorbs and holds water vapor. In the context of flower preservation, silica gel works by pulling moisture from the flower, which helps in maintaining the flower’s original shape and vibrant colors.
Introduction to Silica Gel: How It Works and Why It’s Effective
Silica gel is a granular, porous form of silicon dioxide which can absorb up to 40% of its weight in moisture.
This high absorption rate makes it ideal for quick and effective drying of flowers, preventing the decay and discoloration that can occur with slower drying processes.
Optimal Flowers: Best Candidates for Silica Gel Drying
Flowers with delicate structures and vibrant colors benefit the most from silica gel drying. These include:
- Roses
- Lilies
- Zinnias
- Chrysanthemums
- Orchids
Thicker flowers like roses can be dried whole, while larger, more dense flowers might need petals to be dried separately to ensure thorough drying.
Detailed Process: Step-by-Step Guide to Using Silica Gel
- Container Preparation: Choose a container with a tight-sealing lid that is large enough to hold your flowers without crowding them.
- First Layer: Pour a layer of silica gel into the container to form a base about 1-2 inches thick.
- Arranging Flowers: Place flowers face-up on top of the silica gel. Gently pour silica gel around the bases of the flowers, slowly covering them until completely submerged.
- Sealing: Ensure the container is sealed tightly to prevent any air from entering.
- Waiting Time: The drying time can vary depending on the type of flower, but generally, it takes about 3-7 days. Check the progress at the minimum time to see if the flowers feel dry and firm.
- Removal and Cleaning: Once dry, carefully remove the flowers and use a soft brush to remove any remaining silica gel particles. A hairdryer set on cool can help remove gel from hard-to-reach areas.
Troubleshooting: Addressing Common Issues and How to Solve Them
- Flowers Losing Color: This can occur if the flowers are left in the silica gel for too long. Monitoring the flowers closely during the drying process can prevent over-drying.
- Moisture Retention: Sometimes, thicker parts of the flower might retain moisture. Using more silica gel or extending the drying time can help.
- Flower Damage: Handle flowers gently when removing them from the silica gel as they become very brittle. If petals fall off, they can be reattached with a small dab of glue.
Silica gel drying is a fantastic method for preserving the natural beauty of almost any flower, making it an excellent choice for craft projects, floral displays, or even as keepsakes from special events.
Method 04: Microwave Drying
Using a microwave helps expedite the drying process of flowers by using heat to evaporate moisture quickly. This method is especially useful when you need dried flowers in a short amount of time.
Advantages of Microwave Drying: Speed and Efficiency
- Speed: Microwave drying can dry flowers in minutes, as opposed to days or weeks with other methods.
- Efficiency: This method can maintain more of the flower’s original color and structure compared to air drying.
- Convenience: Easily done at home with common household items.
Necessary Materials: What You’ll Need to Begin
- Microwave-safe container
- Silica gel: To absorb the moisture from the flowers.
- Cup of water: To be placed in the microwave alongside the container to avoid overheating.
- Paper towels or coffee filters: To cover the flowers and prevent direct contact with the intense heat.
Procedure: Step-by-Step Microwave Drying Instructions
- Preparation: Place a layer of silica gel in a microwave-safe container.
- Arrangement: Lay the flowers on the silica gel and gently cover them with more silica gel. Ensure the flowers are completely covered but not crushed.
- Covering: Place a microwave-safe cover or microwave-safe plastic wrap over the container.
- Microwaving: Set the microwave on a low power setting and start with short intervals of 30 seconds to 2 minutes. Place the cup of water inside as well to prevent the microwave from overheating.
- Checking: After each interval, check the flowers’ progress. Continue the process until the flowers are dry, which typically takes between 2 to 5 minutes in total, depending on the flower type and microwave strength.
- Cooling: Allow the flowers to cool in the silica gel before removing them.
Safety Precautions: Ensuring a Safe Drying Process
- Monitor Continuously: Never leave the microwave unattended while in use.
- Use Low Heat: High temperatures can cook the flowers or cause them to catch fire.
- Water Cup: Always include a cup of water in the microwave to help manage the temperature and add moisture to the environment, reducing the risk of overheating.
- Ventilation: After drying, allow the microwave to air out, as the process can create strong odors.
- Handling: Handle flowers gently after drying as they become very delicate.
Microwave drying is a quick and effective method to preserve flowers, perfect for those needing rapid results. With proper safety precautions and careful monitoring, it provides an excellent alternative to traditional drying methods, keeping flowers’ appearances close to their natural state.
Method 05: Glycerin Compound
Glycerin, a natural compound, effectively preserves flowers by replacing their water content, which prevents them from drying out and becoming brittle.
Why Glycerin?: Benefits of Using Glycerin for Preservation
- Flexibility: Flowers preserved with glycerin remain soft and pliable, unlike the brittle texture from traditional drying methods.
- Durability: Glycerin-preserved flowers last longer and are less susceptible to environmental conditions like humidity and temperature.
- Aesthetic Quality: Maintains a more natural and vibrant look compared to dried flowers.
Suitable Flowers: Identifying the Best Flowers for This Method
- Woody plants such as roses, magnolias, and hydrangeas are ideal because their sturdy structures absorb glycerin well.
- Foliage like eucalyptus, laurel, and ferns also respond well to glycerin, making them excellent for adding greenery to arrangements.
Application Guide: How to Prepare and Use a Glycerin Solution
- Mixing Solution: Combine two parts warm water to one part glycerin. The warm water helps the glycerin dissolve more effectively.
- Preparation: Cut the stems of the flowers diagonally to increase the surface area for absorption.
- Soaking: Place the stems in the glycerin solution. Ensure that the stems are fully submerged but the leaves and flowers are not.
- Waiting Time: Allow the flowers to sit in the solution for 2 to 6 weeks. The time will depend on the type of flower and the desired level of saturation.
- Removal and Drying: Once the flowers have absorbed enough glycerin (they should feel supple and well-saturated), remove them from the solution and gently pat them dry with a soft cloth.
Care Tips: Maintaining the Beauty of Glycerin-Preserved Flowers
- Dust Regularly: Use a soft brush or a feather duster to gently remove dust from the flowers.
- Avoid Direct Sunlight: While glycerin-preserved flowers are more durable, prolonged exposure to direct sunlight can fade their colors.
- Optimal Humidity: Try to keep glycerin-preserved flowers in moderate humidity environments to maintain their best appearance.
- Handling Care: Even though they are more durable, handle the flowers gently to avoid damaging them.
The glycerin method is a fantastic choice for preserving flowers when flexibility and natural appearance are paramount. Perfect for decorative purposes, these preserved flowers can offer a lasting beauty that mimics fresh blooms without the upkeep.
Section 3: Displaying and Maintaining Preserved Flowers
Preserved flowers provide a wonderful opportunity to enhance the aesthetic of any space with lasting beauty.
This section explores various ways to display and maintain these flowers, ensuring they continue to be a focal point in your home for years to come.
Display Options: Ideas for Showcasing Preserved Flowers in Your Home
Glass Domes and Cloches:
Encasing preserved flowers in glass domes or cloches not only protects them from dust but also creates a beautiful, museum-like display that highlights their beauty.
Shadow Boxes:
Mounting flowers in a shadow box can turn your floral arrangement into wall art, perfect for adding botanical flair to any room.
Wreaths:
Creating wreaths from preserved flowers is a fantastic way to decorate doors or walls seasonally or year-round.
Floating Frames:
Use floating frames to display pressed flowers for a modern and minimalist look.
Decorative Vases:
Simply arranging stems in a decorative vase can bring a classic and elegant touch to any table or shelf.
DIY Floral Arrangements: Step-by-Step on Creating Your Own Arrangements
1. Select a Theme:
Choose colors and types of flowers that complement each other and fit the style of the room where the arrangement will be placed.
2. Prepare Your Materials:
Gather your preserved flowers, floral foam (if needed), a vase or container, and any additional decorative elements like moss or decorative stones.
3. Arrange the Base:
If using floral foam, cut it to fit your container and securely place it at the bottom. Begin by arranging larger flower heads or focal flowers.
4. Add Smaller Flowers and Fillers:
Intersperse smaller blooms and filler foliage to create volume and texture, ensuring all sides are visually balanced.
5. Final Touches:
Adjust the flowers to ensure they are securely placed and visually appealing from all angles. Add decorative elements like ribbons or small ornaments if desired.
Long-Term Care: Tips to Ensure Preserved Flowers Last
Avoid Moisture and Humidity:
Keep preserved flowers in a dry environment to prevent them from absorbing moisture, which can lead to degradation.
Keep Out of Direct Sunlight:
Exposure to direct sunlight can fade the colors of preserved flowers over time. Opt for a shaded spot where they can be admired without the risk of light damage.
Dust Regularly:
Use a soft brush or a blow dryer on a cool, low setting to gently remove dust from the flowers without damaging them.
Avoid Physical Contact:
Place preserved flowers where they will not be frequently touched or bumped to maintain their integrity.
Control the Environment:
Avoid placing preserved flowers near vents, heaters, or open windows where they can be exposed to drafts or extreme temperatures.
By following these guidelines for displaying and maintaining preserved flowers, you can enjoy their beauty for a long time, making them a worthwhile investment for home decoration.
Section 4: Common Mistakes and How to Avoid Them
Preserving flowers is both an art and a science, and like any craft, certain pitfalls can compromise the quality and longevity of the final product.
Here, we’ll explore some common mistakes made during the preservation process and provide guidance on how to avoid them.
Over-Drying and Brittleness: How to Prevent Common Drying Errors
Monitor Humidity Levels:
Over-drying often occurs in environments that are too dry. Maintaining a balanced humidity level is essential to prevent flowers from becoming too brittle.
Avoid Over-Exposure to Heat:
Do not place flowers in overly hot areas, such as near heaters or in direct sunlight, as this can accelerate drying and lead to brittleness.
Use Correct Techniques:
Each flower type may require a specific method of drying or preserving. For example, delicate flowers might better retain their form and color through silica gel drying rather than air drying.
Improper Storage: Best Practices for Storing Preserved Flowers
Controlled Environment:
Store preserved flowers in a cool, dry place away from direct sunlight. Exposure to UV light can fade colors, and excess heat or moisture can degrade the preservation materials.
Avoid Plastic Bags:
Storing in plastic bags can trap moisture, leading to mold or mildew. Instead, use breathable materials or containers that allow for air circulation.
Keep Them Covered:
Use a cover like a glass dome or a box to protect the flowers from dust and physical damage but ensure the cover does not promote humidity buildup.
Flower Selection: Choosing the Right Flowers for Each Method
For Drying:
Opt for flowers with low moisture content such as lavender, baby’s breath, and most varieties of daisies and roses. These tend to dry beautifully and maintain their shape.
For Pressing:
Choose flowers that are naturally flatter and have a single layer of petals, such as pansies, violets, and ferns, which will retain their form and color well when pressed.
For Glycerin Preservation:
Woody plants with robust stems like hydrangeas, magnolias, and eucalyptus are ideal as they absorb glycerin effectively and maintain a fresh, supple appearance.
For Silica Gel Drying:
Flowers that are more bulbous and have a higher moisture content, such as orchids, chrysanthemums, and peonies, are best preserved using silica gel to maintain their three-dimensional shape and vibrant colors.
By being mindful of these common mistakes and adhering to the best practices for each preservation method and flower type, you can significantly enhance the success and longevity of your preserved flowers, ensuring they remain beautiful for as long as possible.
Conclusion: Celebrating Lasting Beauty
Preserving flowers is more than just a method of extending the life of beautiful blooms; it’s a way to capture moments, memories, and the innate beauty of nature in a form that can be cherished for years.
The art of flower preservation allows us to hold onto the vibrant colors and delicate forms of flowers, transforming them into lasting decorations and meaningful keepsakes.
Reflecting on the Benefits of Flower Preservation
- Aesthetic Appeal: Preserved flowers offer a unique and enduring beauty that fresh flowers can’t sustain, enhancing home decor and providing a constant reminder of special occasions and natural splendor.
- Sustainability: By preserving flowers, we extend the life of these natural beauties, reducing waste and promoting a more sustainable approach to enjoying their allure.
- Emotional Connection: Preserved flowers often hold sentimental value, capturing memories from weddings, anniversaries, or significant moments that can be revisited and cherished.
Encouragement to Experiment: Motivating Readers to Try Different Methods
The world of flower preservation is rich with techniques each offering a different benefit depending on the types of flowers and the desired outcome. Here’s why you should consider experimenting:
- Discover What Works Best: Each method of preservation brings out different qualities in flowers. Experimenting helps you discover the best method for preserving specific types of blooms in your style.
- Enhance Creativity: Trying different techniques can spark creativity, leading to innovative uses and displays of preserved flowers.
- Personal Satisfaction: There is a profound sense of accomplishment and joy in successfully preserving the beauty of flowers. This practice can become a rewarding hobby or even a passion.
Whether you are a seasoned florist or a curious beginner, the preservation of flowers offers a fulfilling path to exploring artistic expression and environmental mindfulness. So, gather some blooms, choose a method, and begin your journey into the enchanting world of flower preservation. Your first masterpiece of lasting beauty awaits!